How to create your first Google ad
If you’re reading this, you already know that advertising is a must for any business, big or small. Deciding where to advertise can take you in lots of directions, from social media platforms like Facebook, to more professionally focused social networks like LinkedIn.
But there’s something even bigger you can be utilizing to your marketing advantage, and that’s Google. As the world’s most powerful search tool and a platform synonymous with expansive reach, Google is here for you to not only surf and search, but to create and display ads that can truly benefit your business and marketing efforts.
If you’re unsure of how to create a Google ad, stick with us because this guide will take you through the step-by-step process.
Display Network vs. Search Network
Google advertising is divided into networks which host certain types of ad. The first, the Google Display Network, is where display ads appear. This network reaches approximately 90% of all internet users. The second, the Google Search Network, is where text based ads appear at the top of the results. They are labeled “Ad” next to the URL and work on a pay-per-click (PPC) basis, meaning you only pay when someone clicks on your ad.
Keyword-based targeting
Google ads are unique in that they are directly connected to, yes Google, and that means you can select certain search keywords that will trigger your ads to rank, or display, higher when people search for them. Think about what keywords or phrases you want to target or fashion your ads around.
This part can be pretty simple; what is your ad promoting? For example, if you’re creating an ad to promote a shoe sale, some keywords you can use are “shoe sale,” “running shoes,” “boots,” “booties,” “sandals,” etc.
Ad campaign vs. ad group
Google organizes the ad creation process by dividing it into levels. You have the ad campaign level, where you determine all of the details of how your ads will run (the objective, scheduling, bidding, etc.), and the ad group level, where you actually create the ad or ads you will run as part of that campaign.
Getting Started
Google Ads, formally Google Adwords, is the Google advertising platform where you will build your ad, set the parameters, and monitor your campaign results. If you don’t already have one, make sure to sign up and create an account here.
Now it’s time to start a new campaign. Simply find Campaigns on the left side of your screen, click the round blue plus sign, and select New Campaign.

Choose your goal
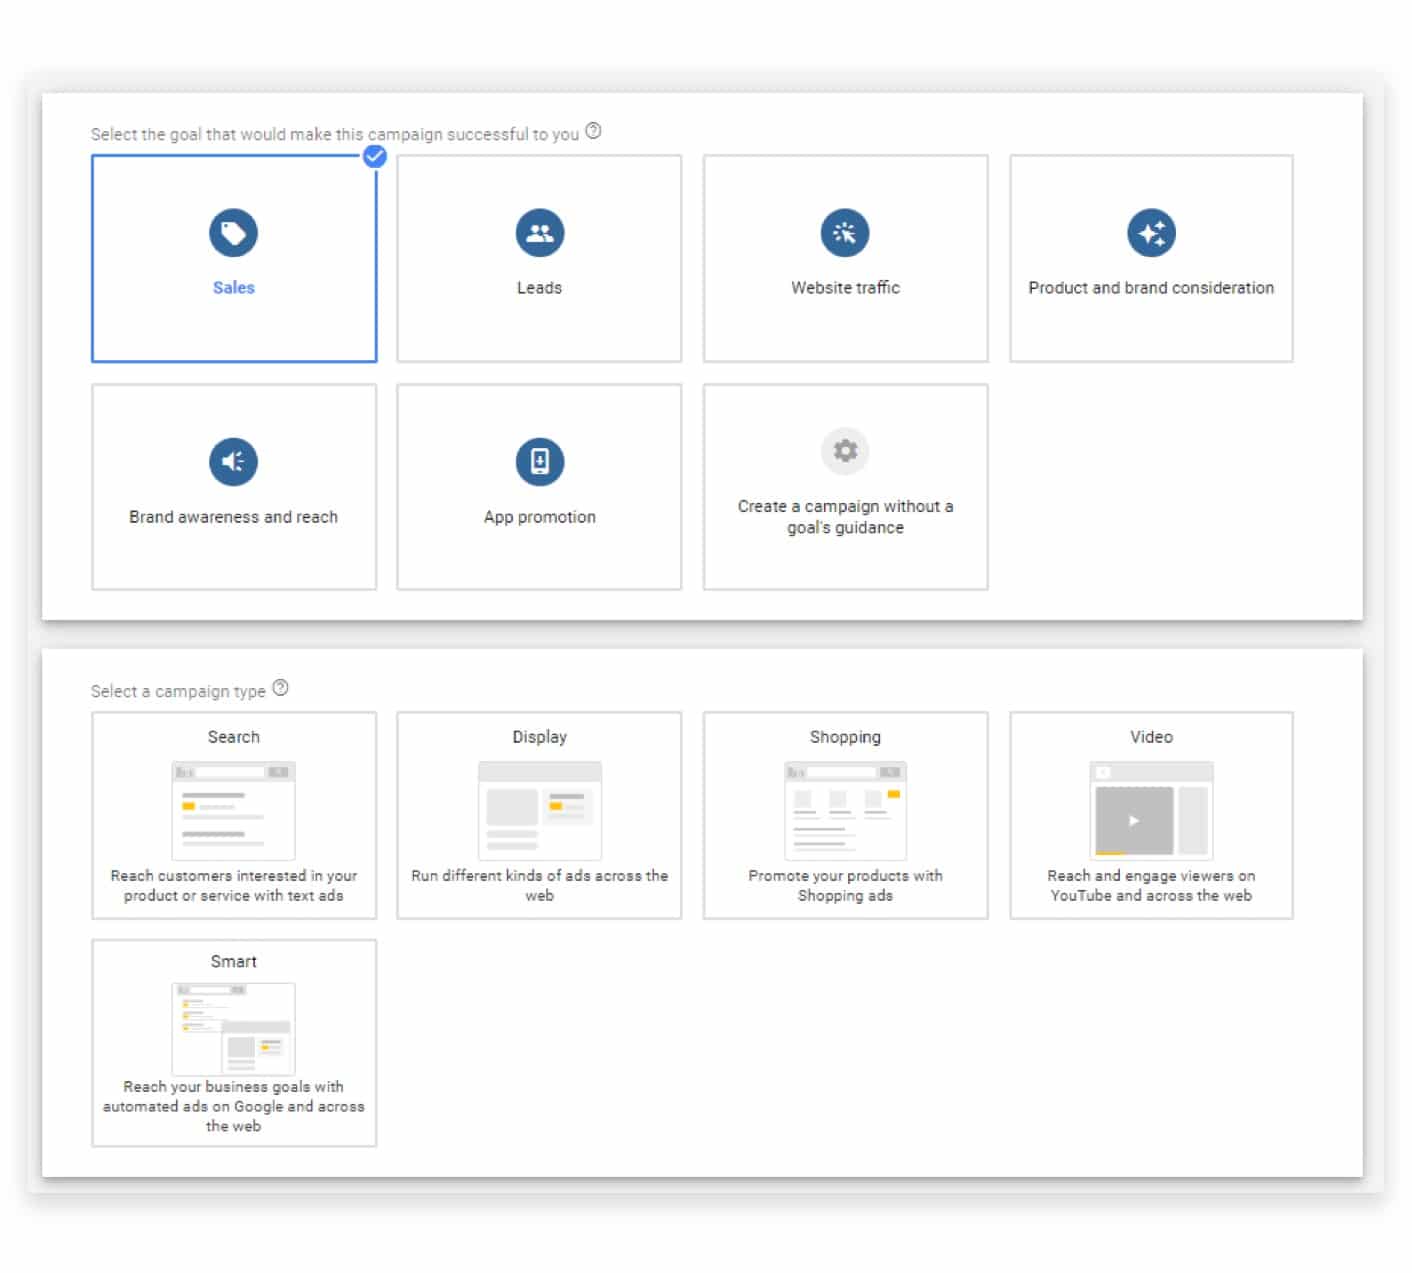
Once you click on New Campaign, you will be prompted to select your goal. You don’t want to jump into the technicalities of structuring your campaign before you really stop to consider your campaign goal. So this is where you should take a moment to make sure your objective is clear. What do you want to achieve with your ad?
This objective can be:
To increase sales: Encouraging more members of your targeted audience to make a purchase based on your ad.
To garner leads: Getting customers or interested parties to provide their contact information by filling out an online form.
To gain website traffic: Driving people to your homepage or a landing page of your choosing.
To increase product and brand consideration: Getting people who have already engaged with your brand, or shown interest in your product or service to come to you when they are ready to make a purchase.
To increase brand awareness and reach: Expanding your existing audience to include more people who will become familiar with, and interact with your brand.
To boost app promotion: Spreading awareness about your app to your audience and leading them to it in the app store.
Because you’ll likely want different ads to achieve different goals, you shouldn’t attempt to keep your objective the same as you run more ads within the same campaign. You can and should assign different objectives to different ads (but only one per ad).
Select a campaign type
Next, choose your campaign type. This translates into the type of ad you will be running.
There are:
Search campaigns which reach your audience via text ads.
Display campaigns which run ads throughout the Google Display Network.
Shopping campaigns which promote your specific products with shopping ads.
Video campaigns which display your ads on YouTube.
Here, we’ve selected ‘Video’ as our campaign type.

Choose your target audience
Who do you want your ad to reach? This answer has to do in part with your campaign objective, but it requires you to know a bit about your target audience too. If you don’t already know, take a look at your customer lists. What is the general demographic of your business’ average customer? Notice their age, location, and buying behaviors.
If you want your ad to appeal to an even more specific group within your audience, you can set the parameters to achieve this as well. Maybe your general audience has an age range of 30-45, but what you’re promoting in this ad will appeal to 18 to 30-year-olds in a certain city. This is the section in which to make these distinctions.
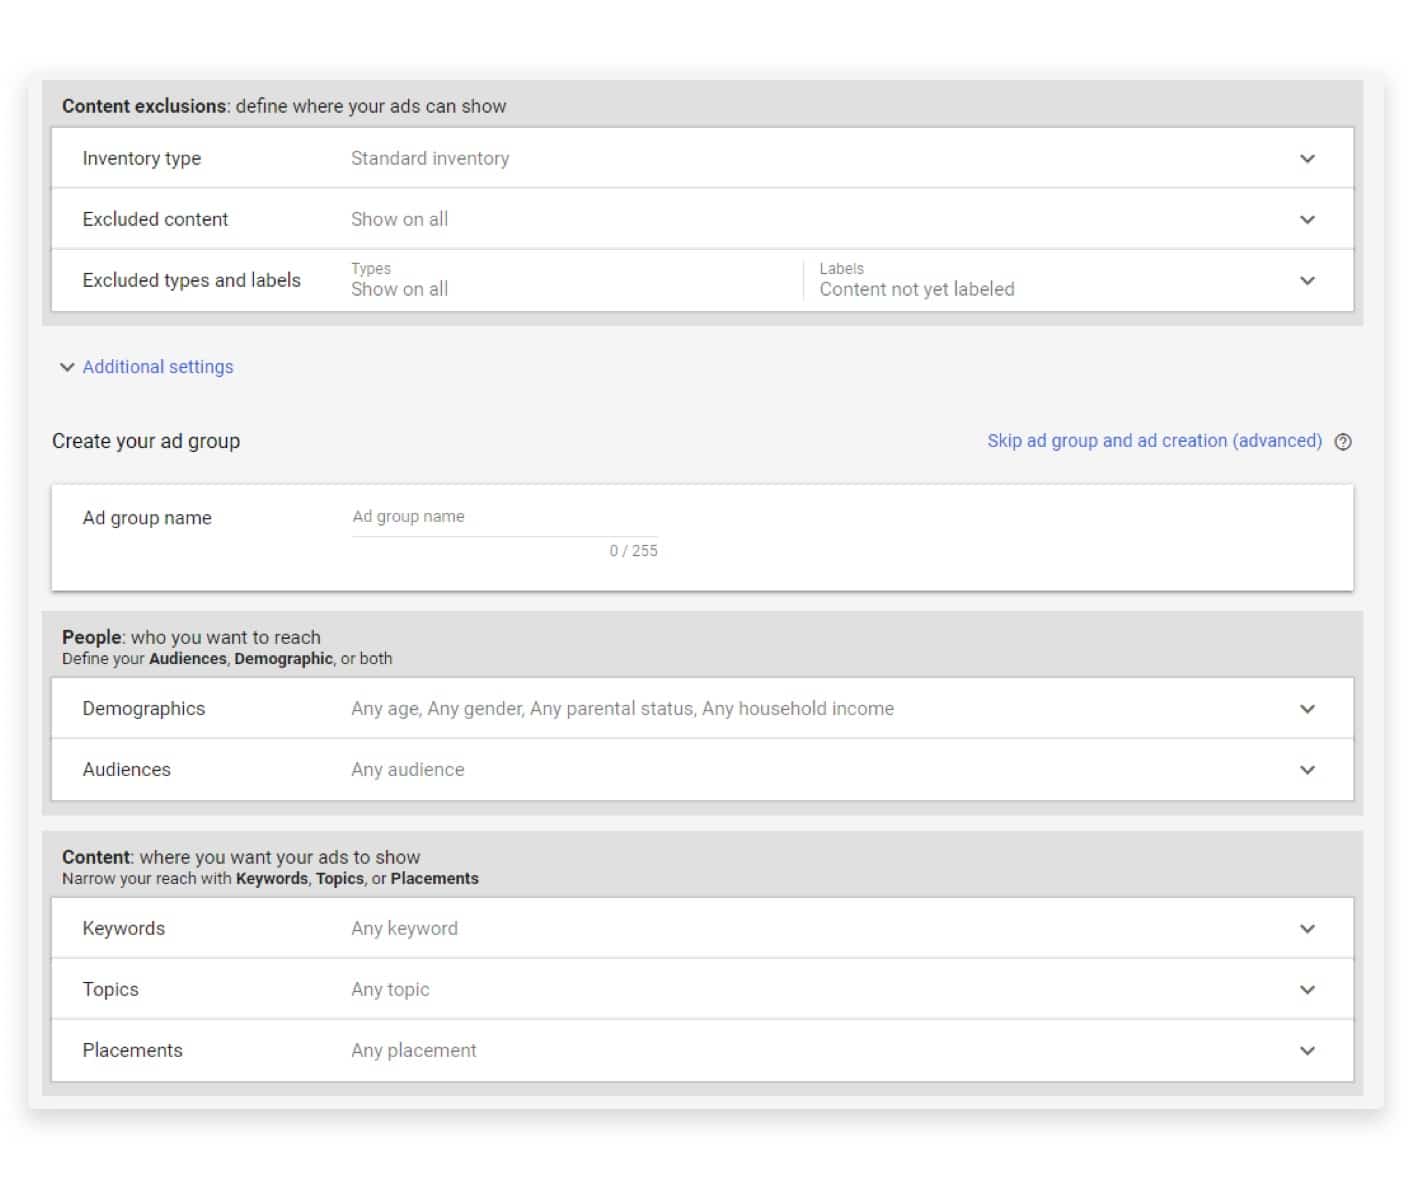
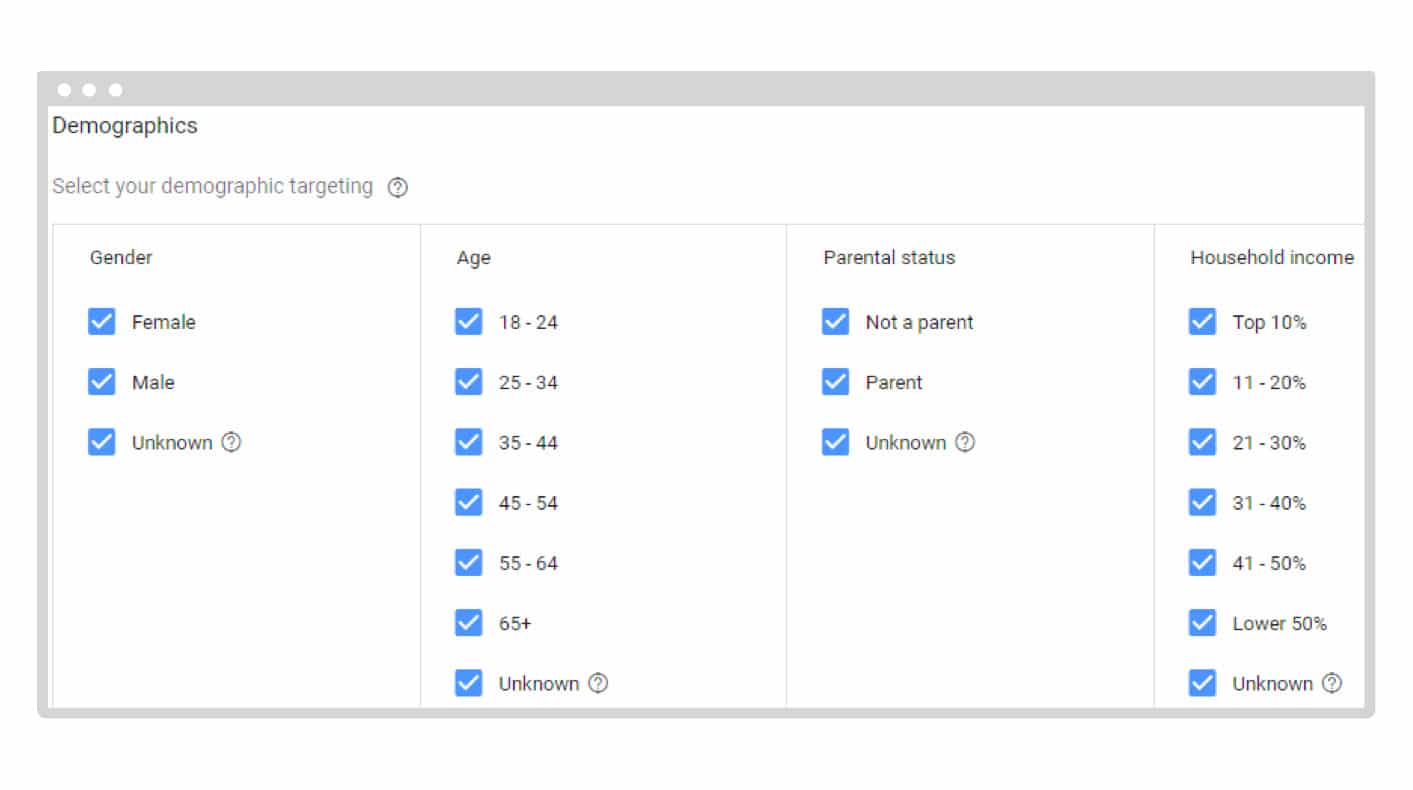
Click on the dropdown arrow next to Demographics. Here you’ll be able to select specific demographic identifiers including age, gender, parental status, as well as household income.
Set your budget
It’s time to decide just how much you want to spend on your ad campaign. There are a couple options for your ad spend here.
First, Google lets you set an average daily budget or the average spend per day for the duration of one month. You are able to go in and change/adjust this amount at any time.
You can also set a campaign total budget, available only for video campaigns. This option is ideal when you already have a set amount you want to spend on your campaign, with a specific start and end date. This option does not let you go back and change the budget once set.

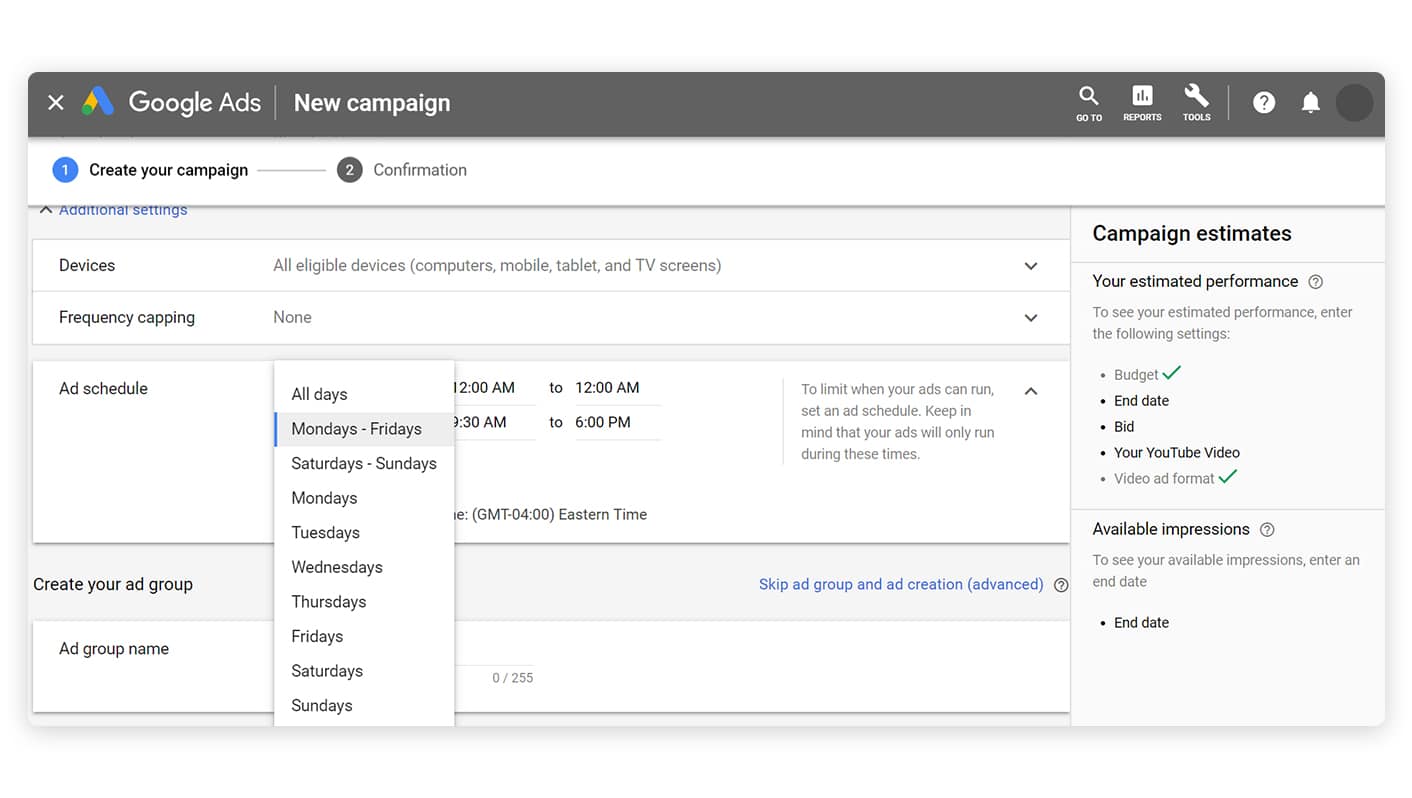
You’ll also be able to select the days and times for your ad schedule. This can be a range of multiple days per week, one day per week, and a time frame of your choosing.
Keywords
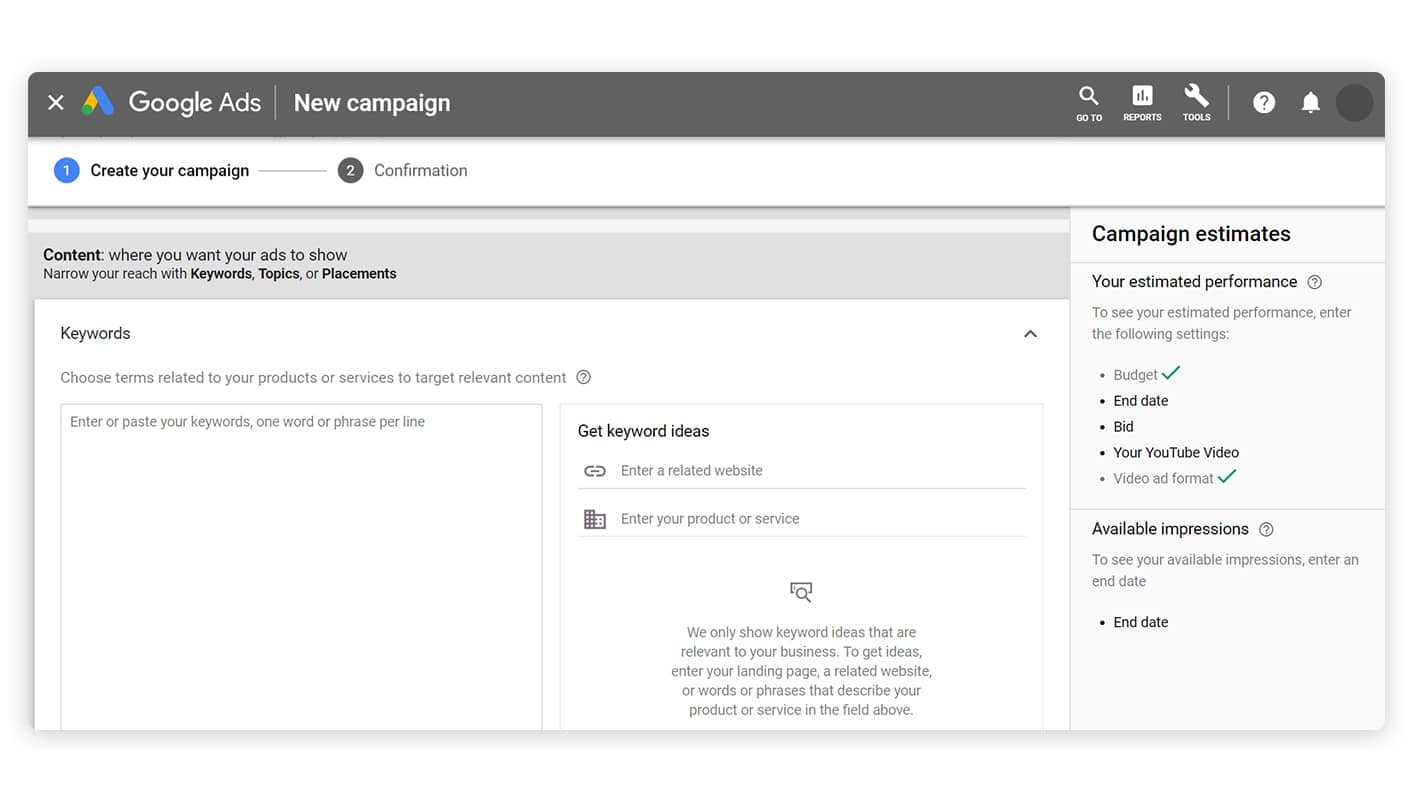
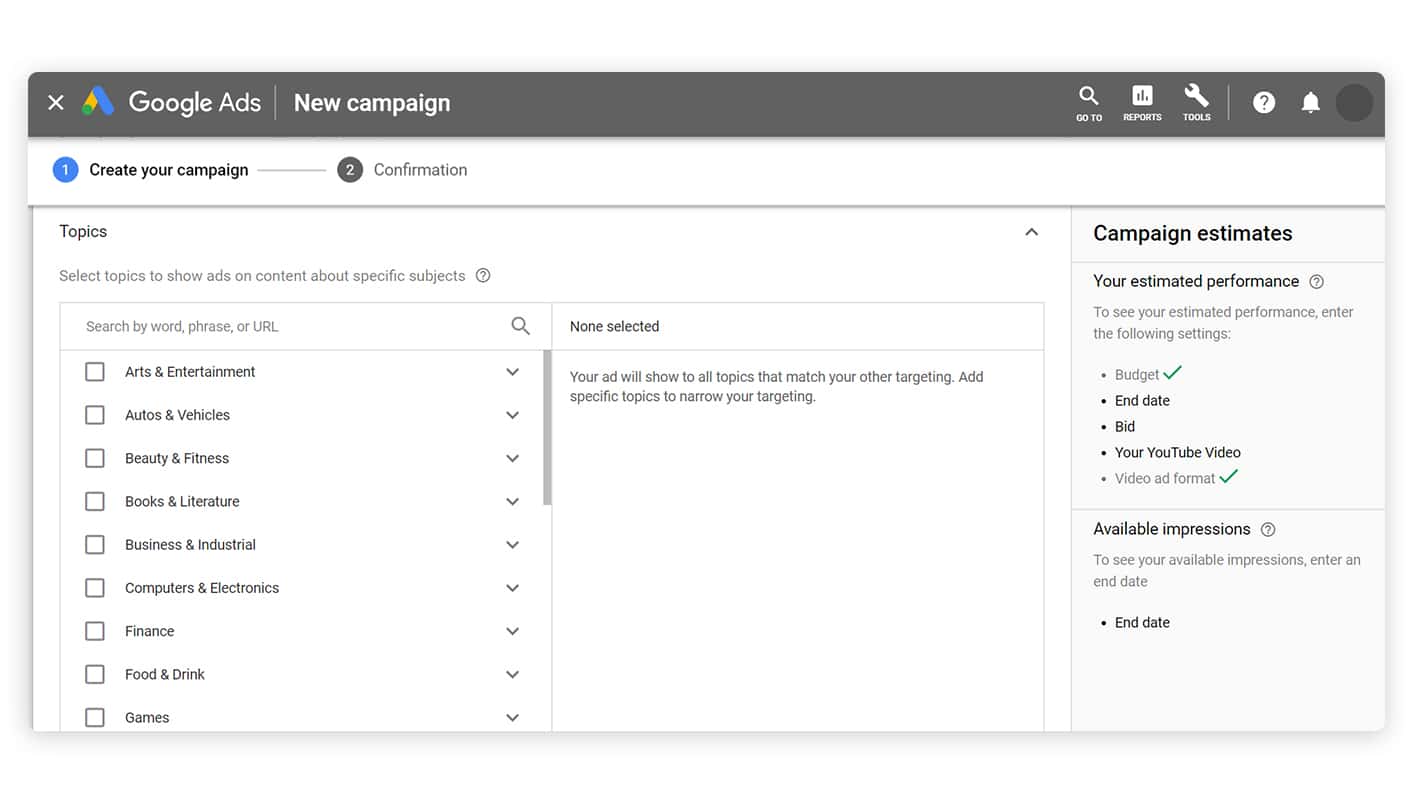
We suggested earlier that you create a brief list of keywords before you start. Google Ads provides you with a Keyword Planner tool that lets you enter the words on your list and receive an expanded list of related keywords in return. You can also select specific topics or subjects to help narrow your targeting.
There are certain keyword parameters that you can set to help control in which searches result your ad will appear. These parameters are called match types, and there are four of them.
Broad match: This match type lets you reach the widest audience, allowing your ad to appear when a user searches for any word or words in your keyword phrase (in any order, spelling mistakes permitted.)
Phrase match: This match type means that your ad will only appear when a user searches for the exact keyword phrase in the correct order.
Exact match: This is now referred to as “close variant matching”, since requiring a true exact match search was actually limiting results due to misspellings and abbreviations. Today, ads will still appear even if the keyword phrases were entered in the wrong order.
Negative match: This match type outlines what not to target. Setting negative keywords prevents your ad from showing up in searches that have no connection to your ad or brand. For example, if your shoe store doesn’t have an online store, you can assign the word ‘online’ to be a negative keyword. Anyone searching for “boots sale online” won’t be shown your ad.
Determine your bidding strategy
Each time someone searches on Google, the platform conducts a lightning-fast auction to choose which ad will get displayed. Your bid is factored into this, as well as the quality score. Your ad’s quality score is a ranking of 1-10 that’s determined by its expected clickthrough rate (Google’s prediction), the ad relevance to its audience, and the user experience of your landing page (tons of pop ups = bad experience).

Now that you have your ad’s search terms ready to go, you have to place a bid on how much you are willing to spend on one click. You can set a cost-per-click (CPC) amount manually, or select from:
Viewable CPM – This bid type gets you as many impressions as possible within your budget. Impressions are good for brand awareness and getting company names and messages seen.
Cost-per-engagement – This bid type gets users to interact with your ad. Engagement is considered hovering over, or clicking on an ad.
Maximize clicks – This bid type attempts to get you the maximum number of clicks that your budget will allow and bring traffic to your site.
Manual CPC – This type of bidding is for more advanced advertisers and gives them the freedom to experiment with different bid amounts more closely.
Enhanced CPC – This bid type achieves a combination of traffic and conversion. Once your ad begins to get clicks, Google will adjust your bids under this setting in order to maximize your conversions.
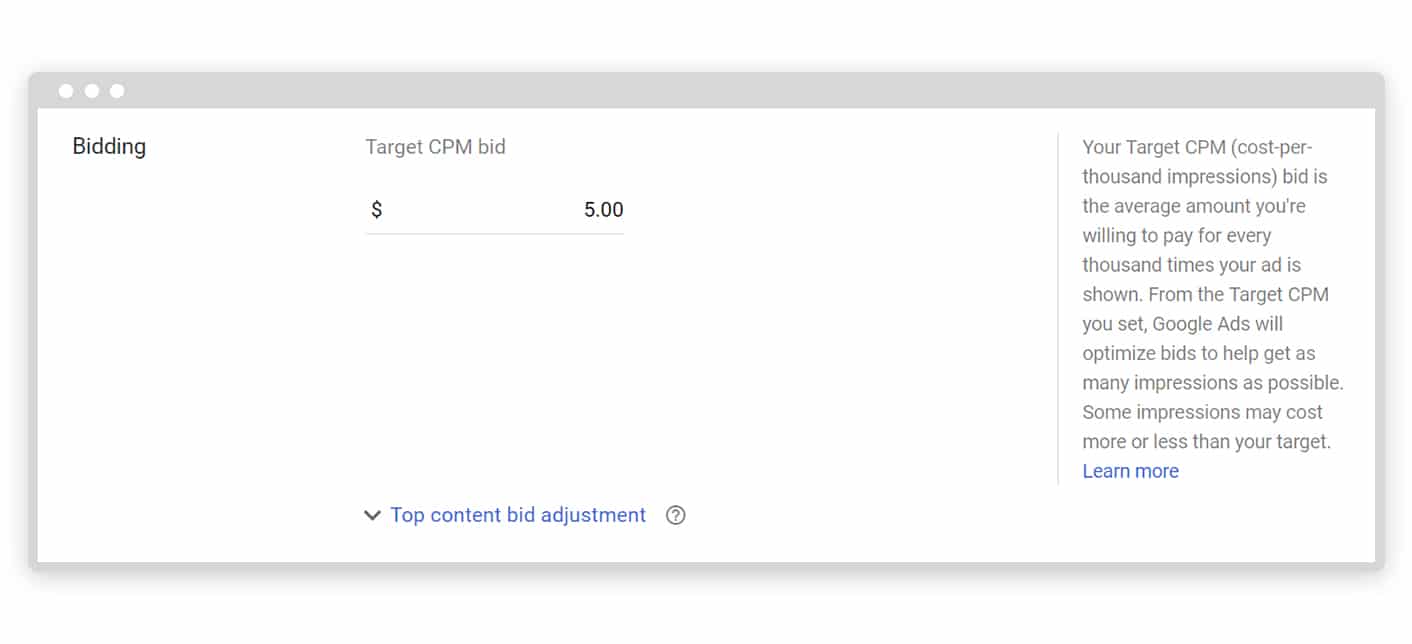
Target CPM – This bid type has you set the approximate amount you’re willing to pay per every thousand times your ad is shown.
Target CPA – A Smart Bidding strategy, this type helps you get as many conversions as possible within the target cost-per-action, sometimes referred to as cost per acquisition (how much it costs to attain a conversion).
Target ROAS – Another Smart Bidding strategy, this bid type determines a conversion value for your ad and aims for a specific return-on-ad-spend (ROAS). It’s used mostly for eCommerce businesses.
Cost-per-view – (CPV) is only applicable to video campaigns and, like pay-per-click ads, you pay for each view (of over 30 seconds.)
Ad format
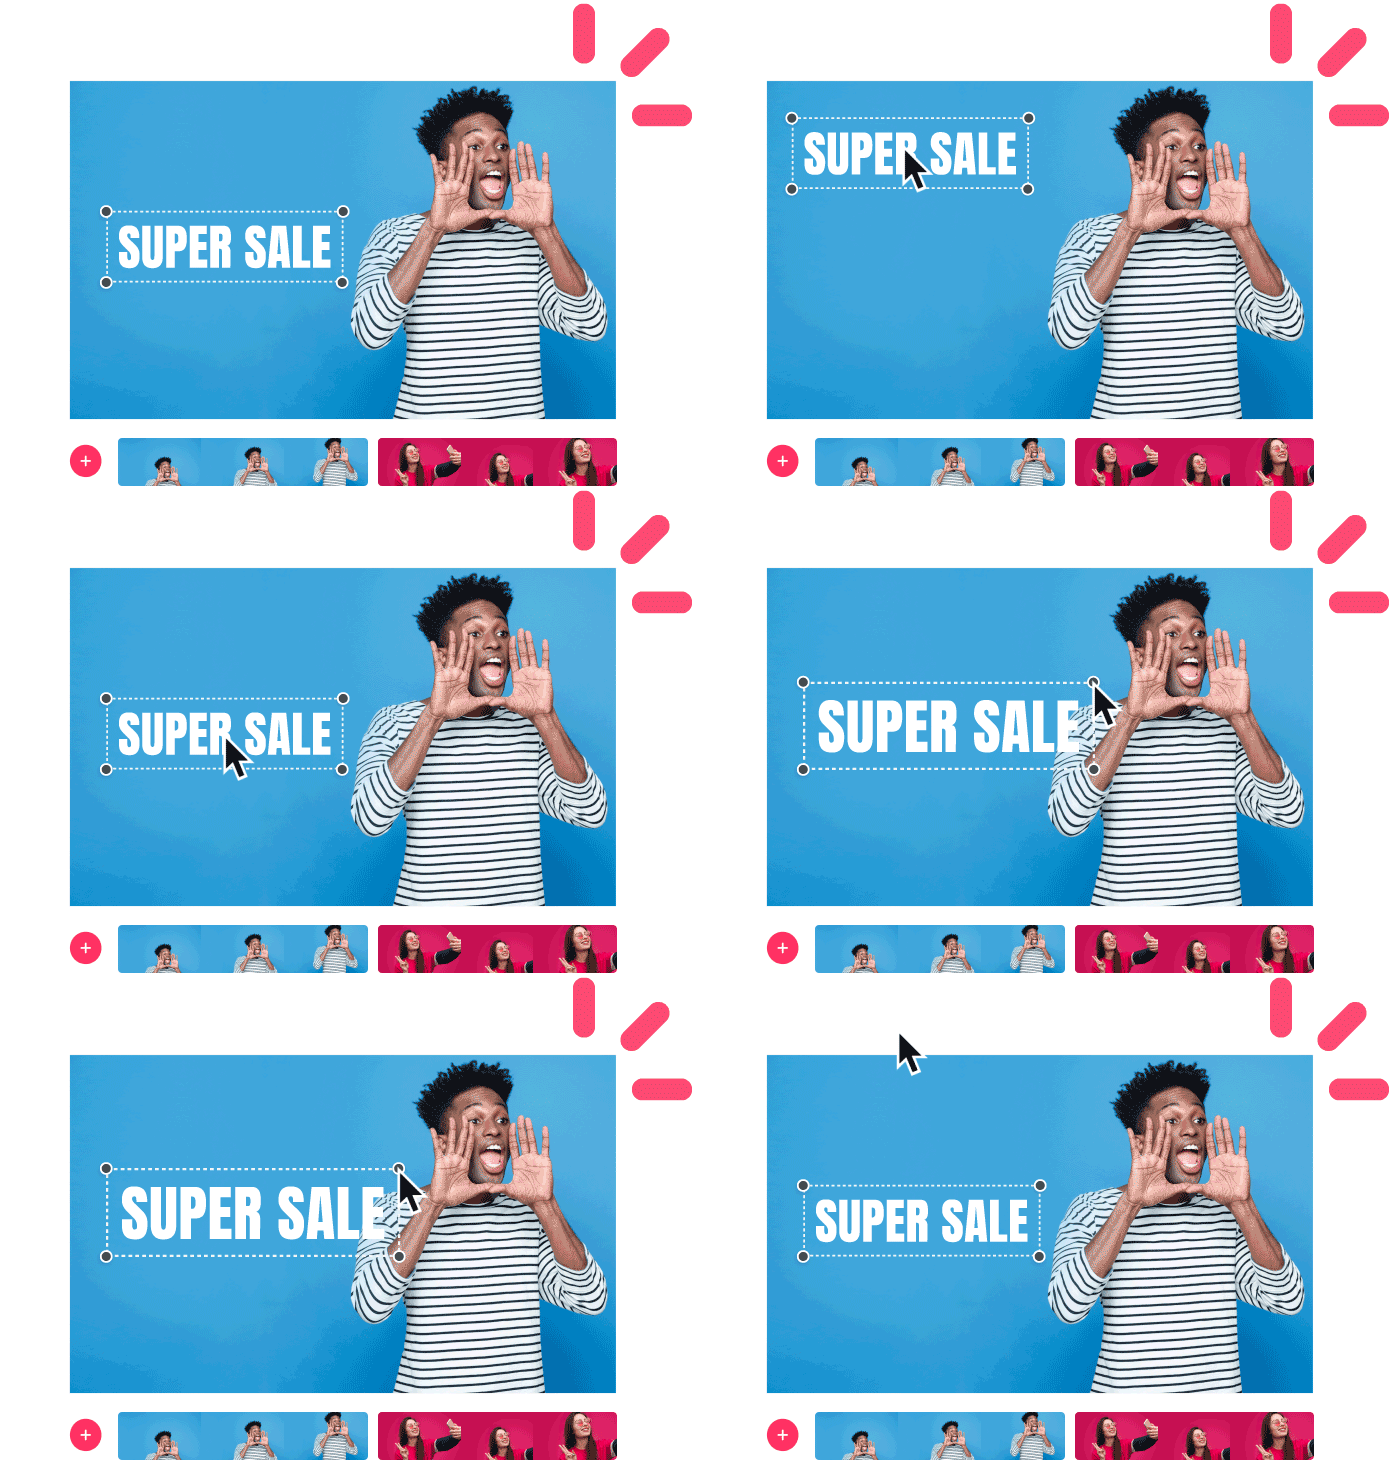
We selected video as our ad format. Video ads tend to perform better than image ads, hold attention longer, and work to compel viewers to take action more often than image ads do. Video creation is an extremely worthwhile tactic to incorporate into your marketing efforts. Contrary to popular belief, it doesn’t actually take much time or skill with the right tools. The Promo Editor can help you produce a polished video ad with your own footage or fully customizable video templates. All you have to do is add your text and logo, and you’re ready to publish it straight to YouTube.
If you don’t select video as your format, there are several other types to consider:
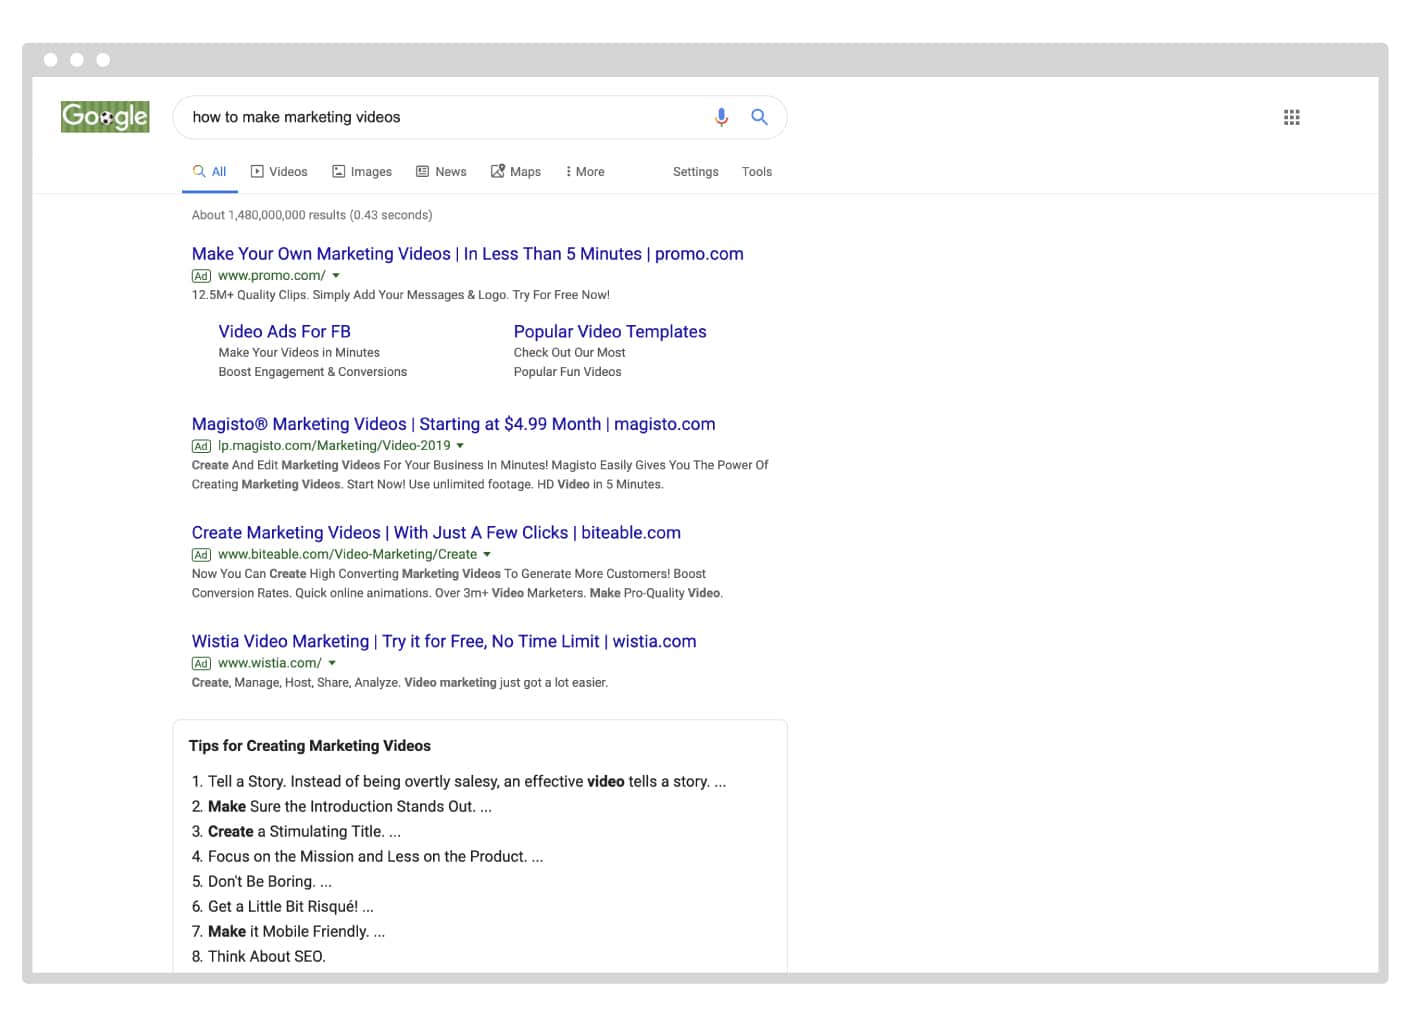
Text ads
When you put a search query in Google, these are the ads that display at the top of your screen. These are PPC ads and are identified by the green ‘Ad’ label beside the URL. You can also put ad extensions in your text ads, such as phone numbers or other information to make them relevant to users.
Product Shopping ads
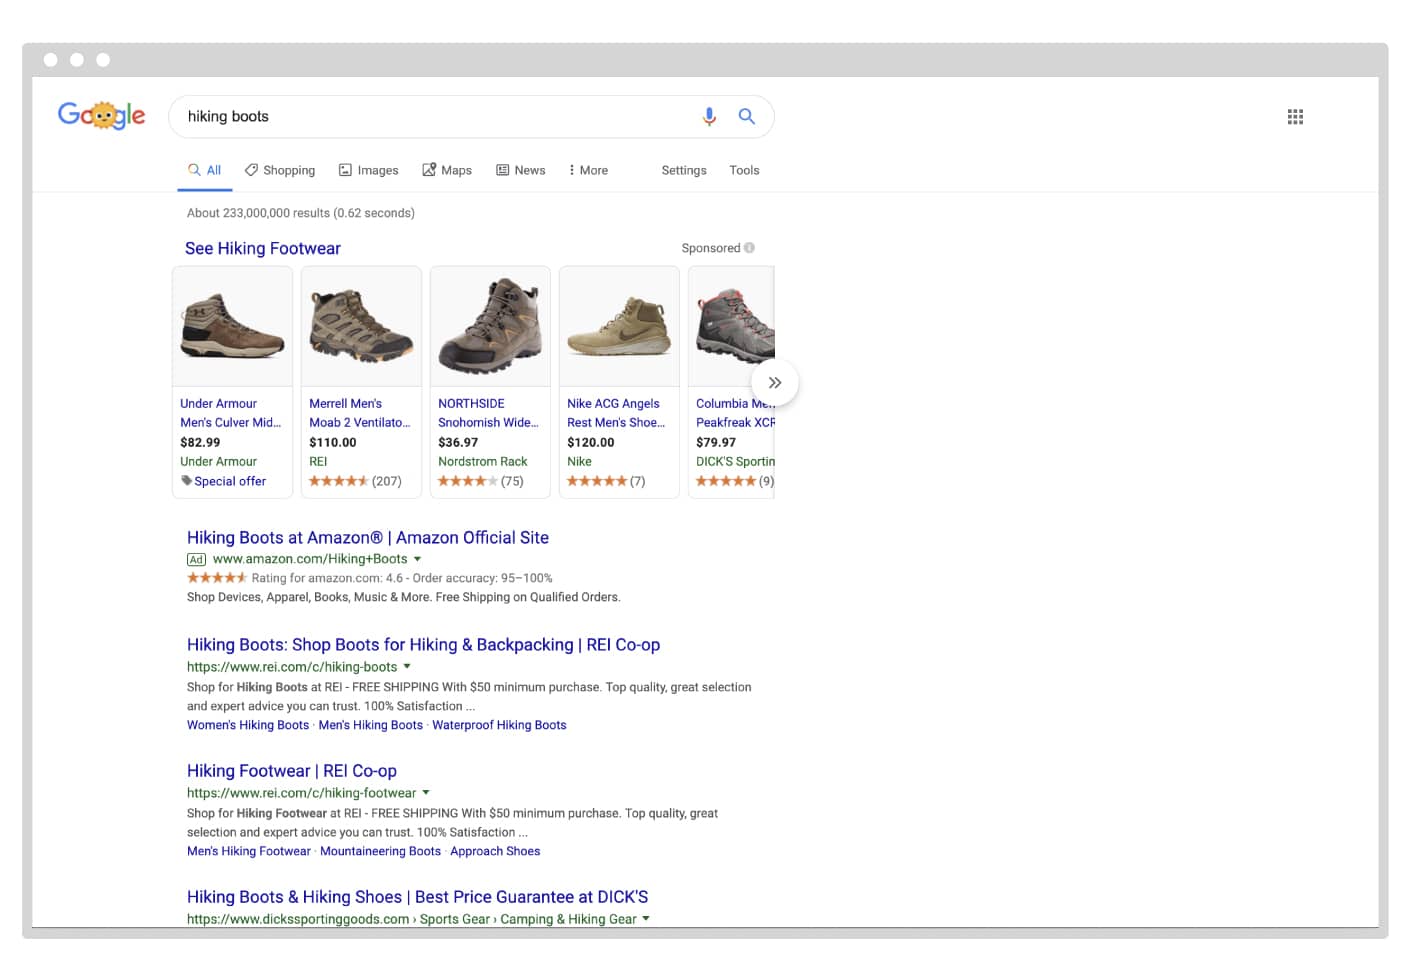
These ads show you a product photo with a name, price, user ratings, and other consumer-relevant details. Clicking on a Product Shopping ad brings the user to the product page.
Showcase Shopping ads
Quite similar to Product Shopping ads, Showcase Shopping ads display a collection of company products and do not display prices until the user follows a link to a product.
App promotion
These ads promote mobile apps and direct users to download them. They can also direct users to a screen within an app they already have downloaded and installed on their devices.

Call-Only ads
These short and sweet ads display the phone number of a location or service and are meant to drive users to place a phone call.
Placements
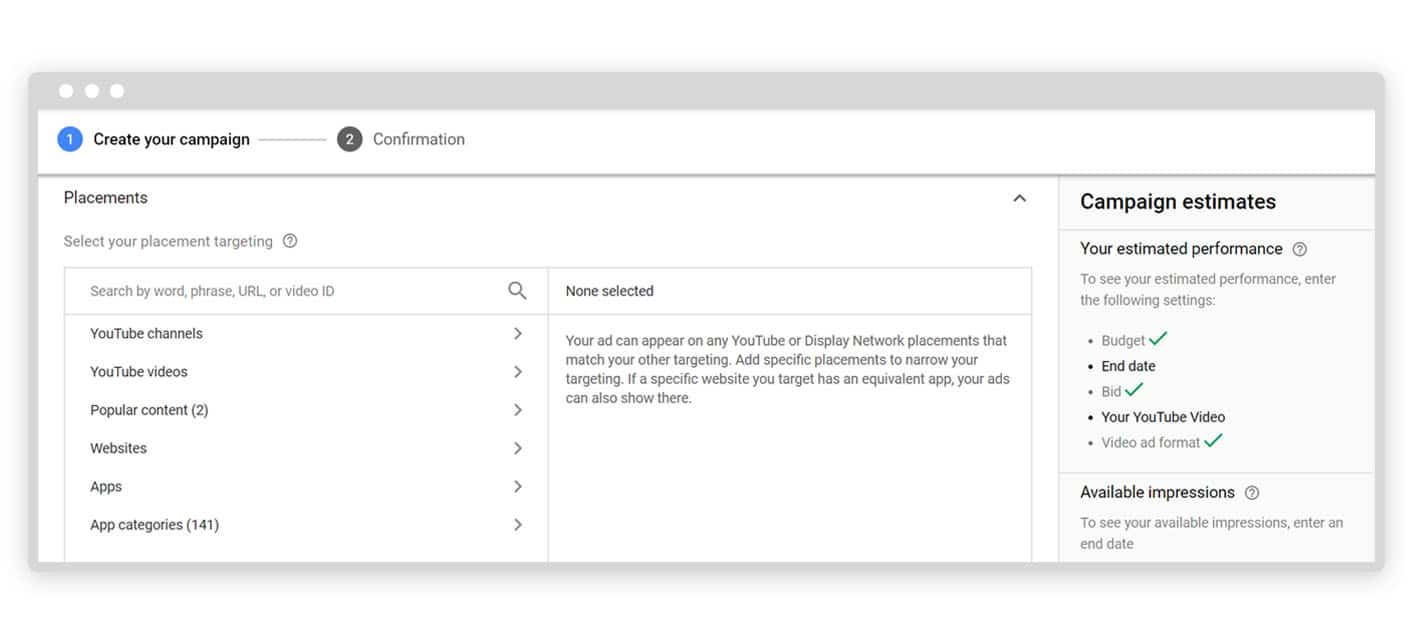
Select where you want your ad displayed – in our case, since we chose to create a video ad, we can select specific YouTube channels we want to host our ads, specific YouTube videos for the ads to display on, as well as certain websites and apps. YouTube is owned by Google and operates as a subsidiary, thus the connected sharing.
Non-video ad placement similarly refers to websites and apps on the Display Network that will display your ad. You can also select specific locations by choosing ‘managed placements’ or let Google choose ‘automatic placements’ it considers most relevant based on your keywords.
Create your ad
Now that all of your specific criteria have been considered and selected accordingly, you are all set to get into the actual ad creation. If you’re using Promo.com to create your video, you’re at the stage where you can upload your video from the Promo Editor into the Google Ads platform.

Then it’s time to write the ad!
You’ve got a great video or image selected and you just need a powerful, captivating message to drive it home. Write the ad copy with title or headline, as well as a strong call-to-action. This can be something like “learn more” or “buy now.” Regardless of what you choose, it should compel action from the user, and encourage them to take the next step after viewing the ad,
In this step you can also toggle between mobile or desktop displays and see how the ad will look on each.
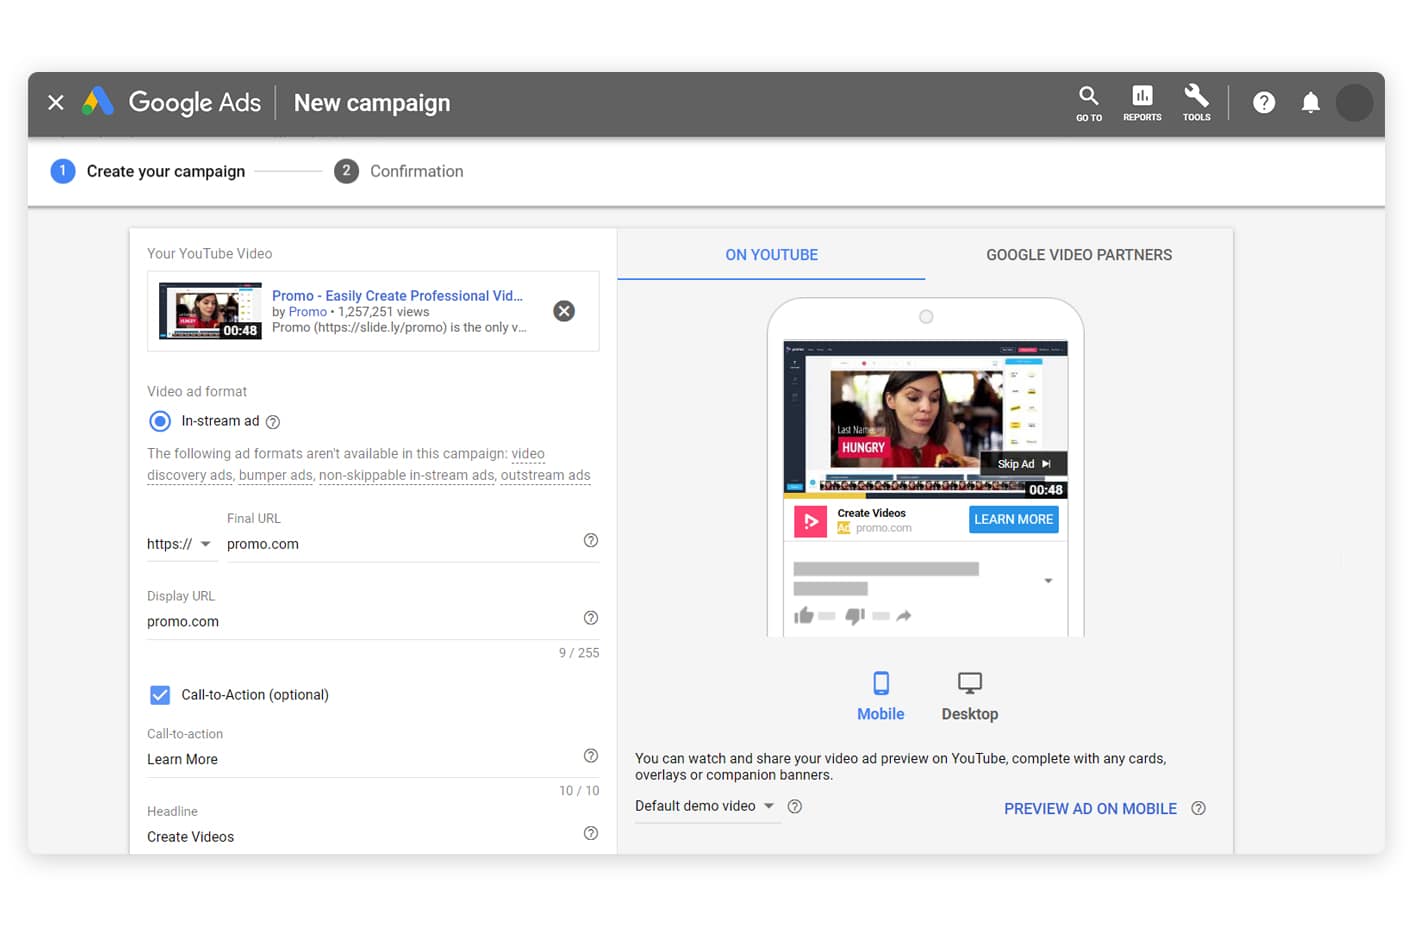
As you write your ad copy, you will see a space above the call-to-action to assign your ad’s display URL. This lets users know where they’ll arrive if they click on your ad. It’s not the full video or image ad URL; it’s the URL you are making visible to the user and is great for brand recognition.
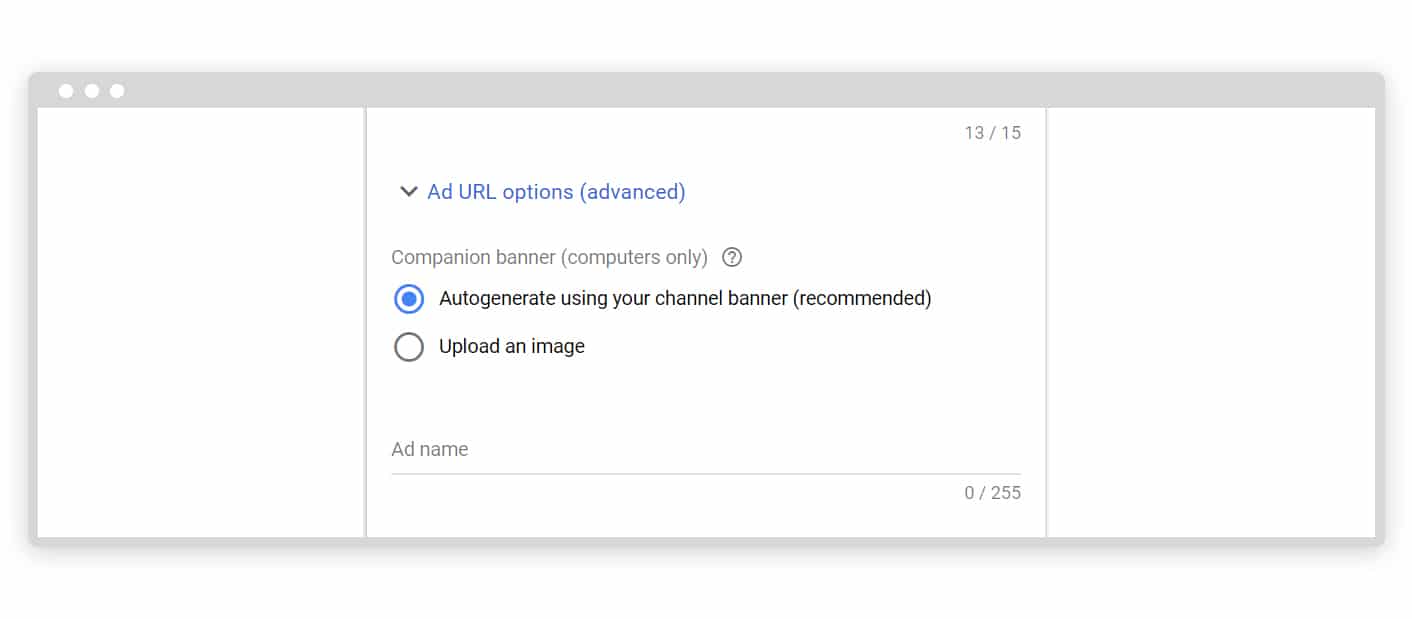
You can select from a couple more advanced ad URL options that will insert a tracking template into your URL for better (albeit advanced) post ad monitoring.
And you’re done!
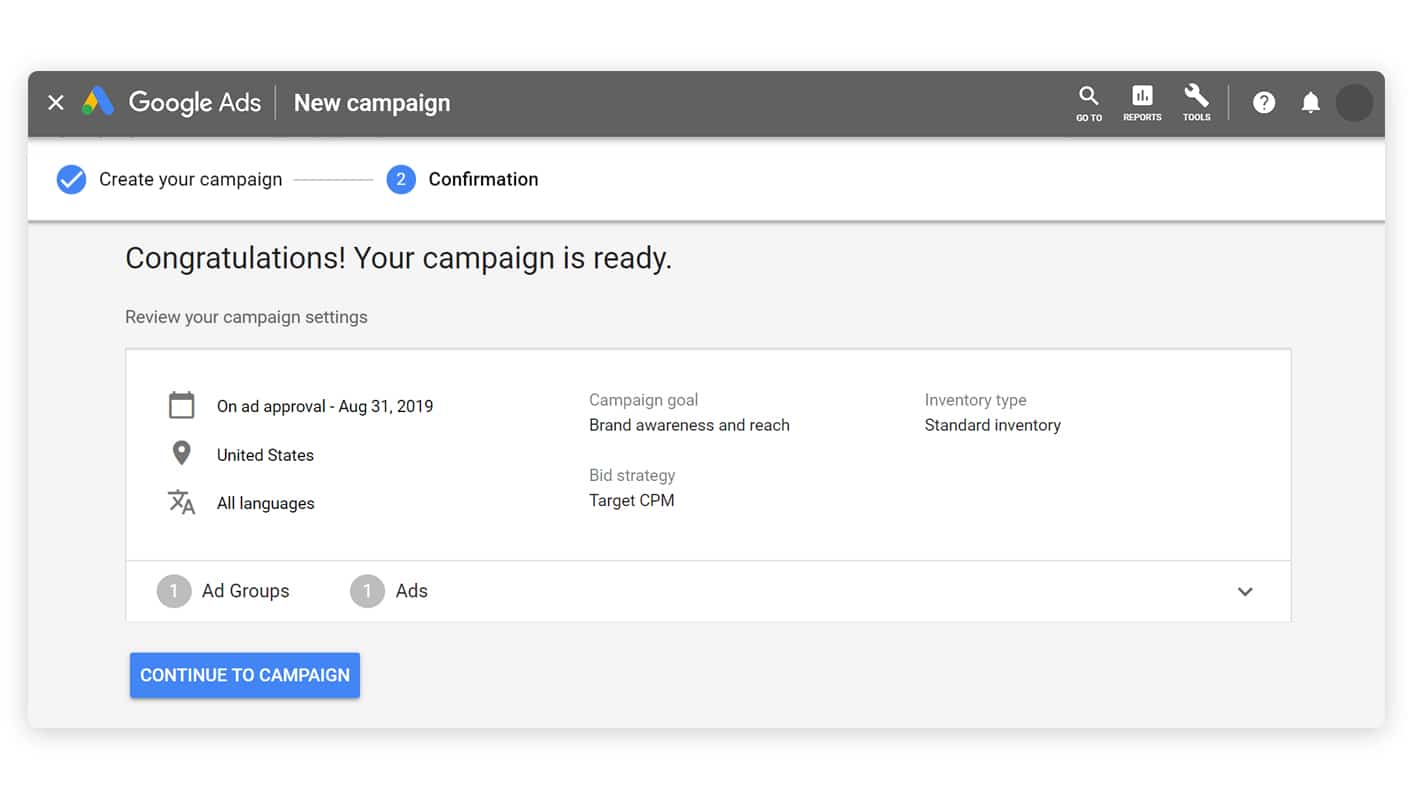
Monitor your ad campaign
You’ve embarked on a long and hopefully not so painstaking process of creating your first ad. But once you set it, you can’t just forget about it. Remember that campaign objective you selected early on? If you’re not monitoring your ads and measuring your results, you won’t really know if your campaign was successful. Be sure to look back at the results dashboard and check your CPC and CPM metrics.
By keeping an eye on your results, you’ll be able to go back into your campaign settings and make adjustments where you see fit. Maybe your ad isn’t resonating with your target audience and you think it would perform better with a different demographic. As long as you know how your ads are being responded to, you will be in a position to improve them.
There’s a lot of things to consider when learning how to make a Google ad. We’re sure that by now you’ve got a solid foundation, and definitely what it takes to make your own!
Get started today!
[banner id=11696]
