How to Use Trimming & Transitions
How to Trim Videos
Getting Started With Promo’s Footage
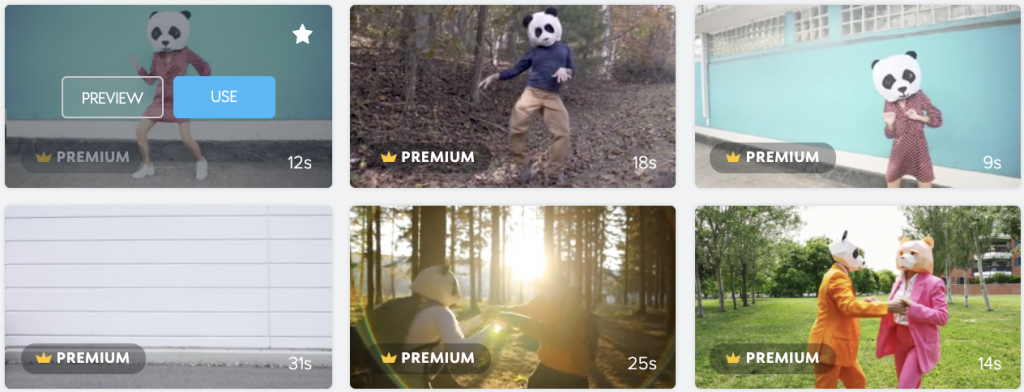
1. Use the “Preview” Option to Trim
It’s easy to trim Promo footage right from the “Preview” option when you’re searching for footage on our main page. Simply hover over the video you want to trim and click “Preview.” A popup window will appear, and from here, you can trim or select the segment you want to use by dragging the two blue handles to each side. If you are unsure which segment you want, you can slide the area between the blue bars across the timeline until you find a section that works for you. Then, you can click play to preview. Once you’re done, click “Use” to start editing a video with this clip.

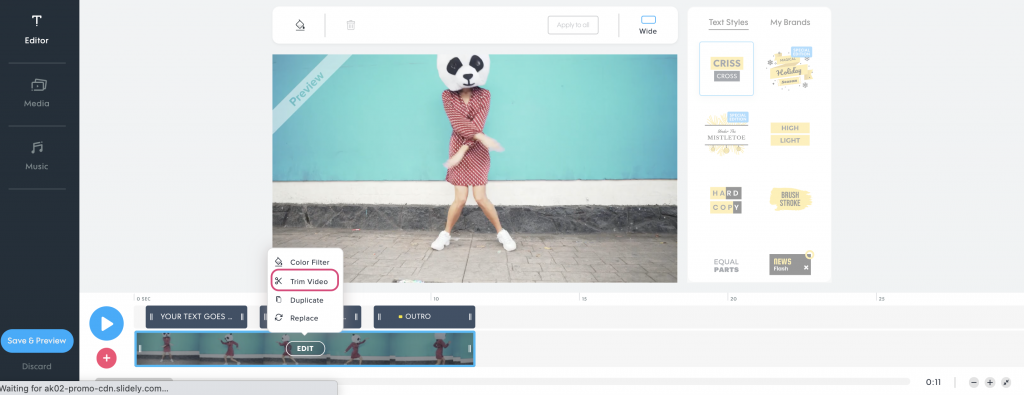
2. From the Editor – Trim, and Apply Video Transitions
Once your video is in the editor, You can also trim and edit your video clips on the timeline by dragging the edges or hovering on the clip and selecting “Trim video”. In between your footage, make sure that there are no gaps between the video segments you have. When all the gaps are closed you’ll see a little button appear in between the segments that give you the option to apply a fade transition or a cut.
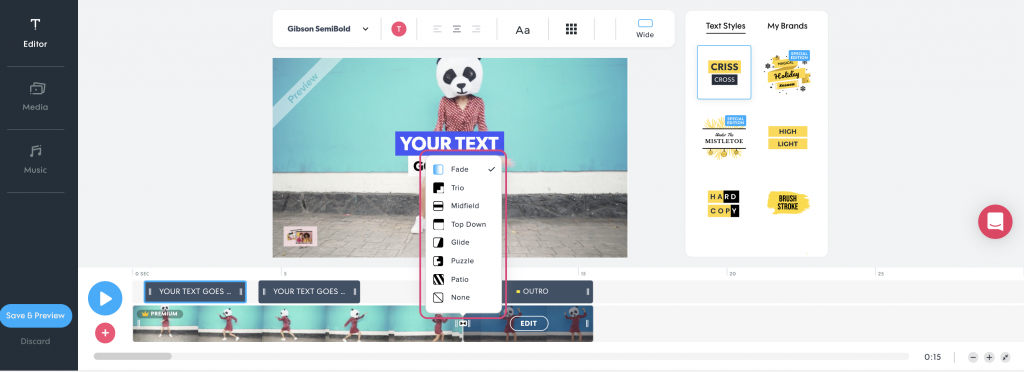
3. Add Images and Animated Photo Transitions
There are more transitions available for photos that are fun to use. But first, you need to add photos to your video footage. Easily add images to your video by clicking the “Media” tab and selecting “Photos” from the drop-down menu next to the search bar, or upload your own by choosing the “Upload tab” and choosing “Photos.” In the editor, you’ll see the same little button attaching the segments together. There are more transition options as well as animation. You can also apply animations with your transitions by hovering on the image and using the “Edit” option to access the transition and animation menu.
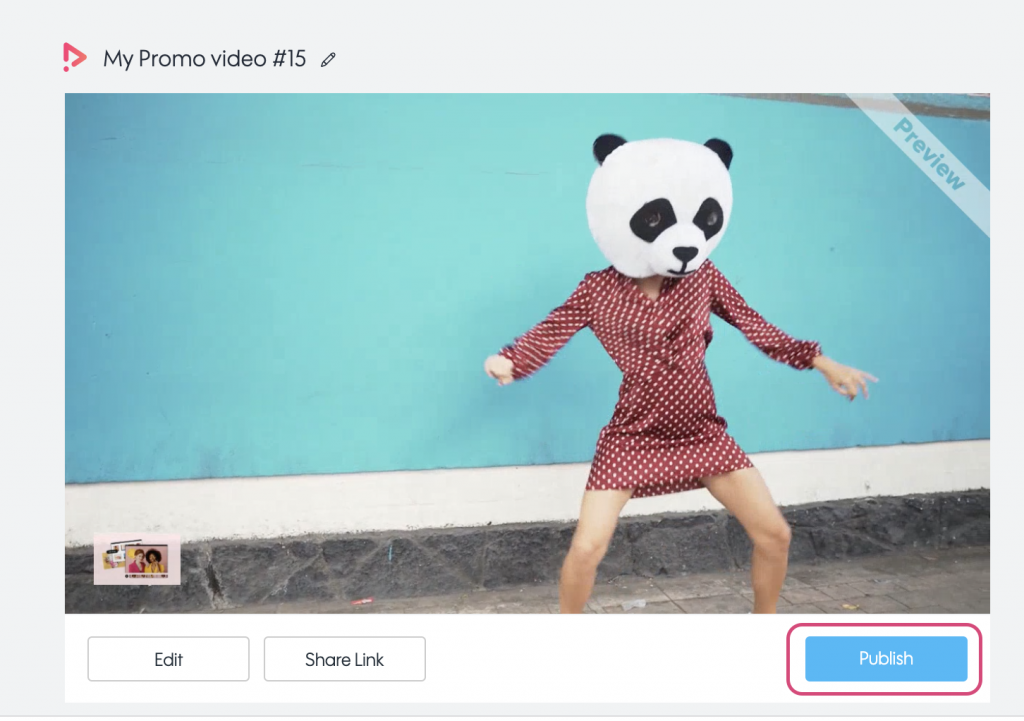
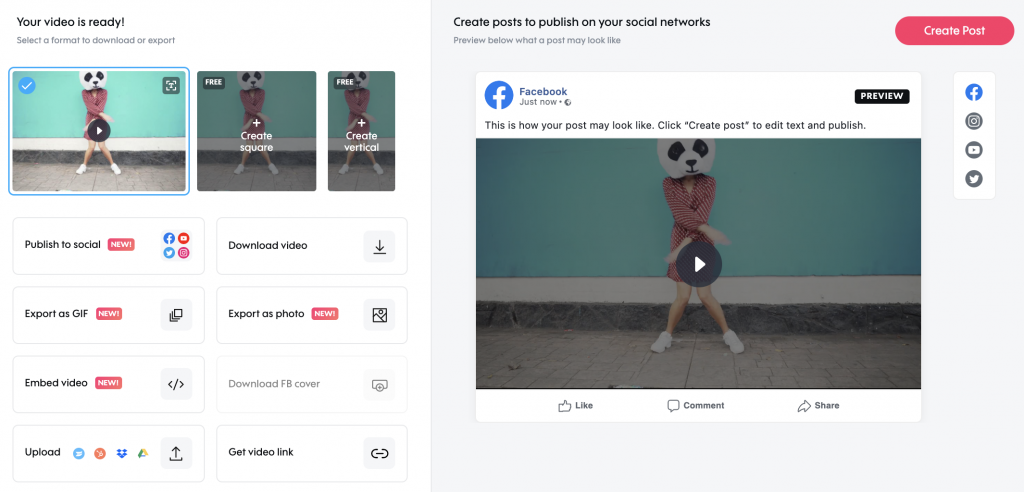
4. Publish & Share
Once you’ve trimmed and applied transitions and are happy with your project, it’s time to publish. From the “Save & Preview” screen, click on “Publish,” which will take you to the publish page. From there, you can download your video to your device, resize your video to the exact social media requirements, make a collage with your video, create a GIF, and more.
Getting Started With Your Footage
If you’re looking to upload your own video and trim and use transitions, we’ve got you covered. All the editing features available when using Promo’s video footage are also available when you upload your own footage.
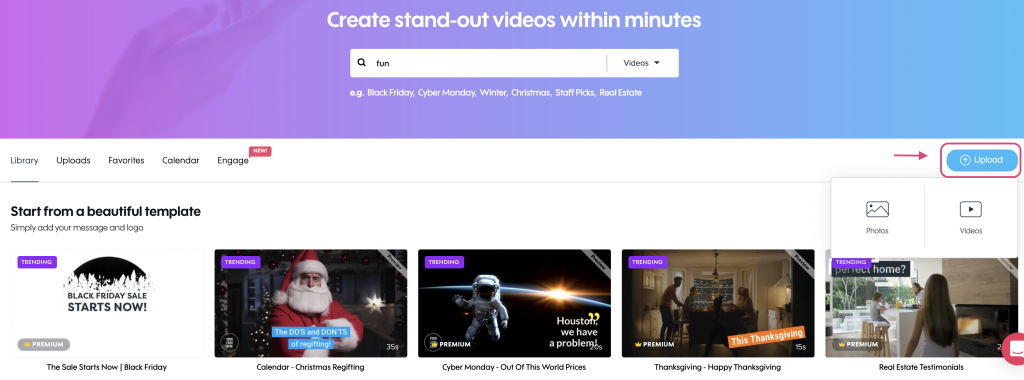
1. Upload Your Footage
From the main page, simply hover on the “Upload” to the right and choose “Photos” or “Videos” to upload the videos or photos you want into the editor.
2. Follow Steps Two Through Three Above
Where Can You Trim Your Video

The “Preview” option when searching for video footage in our extensive footage library.
In the editor by using the blue bars.
In the editor, you can hover over the video segment and use the menu.
More Video Editing Options on Promo
Now that you know how easy it is to trip your videos with Promo, here is a quick reminder of other editing features you can use while your video is in the editor.
Add Captions
You can get creative with your video by adding captions and choosing from a selection of unique animated text styles, color options, and fonts. You can even upload your own brand font for a fully personalized look and use the caption’s slider in the editor timeline to easily place your text strategically in your footage.
Add Music to Video
Select an audio file from our extensive royalty-free 1.5k music library or upload your own favorite audio track to add that professional touch. Adding the right music drives emotional engagement and sets the tone of your video in a powerful way.
Change Aspect Ratio
Resize your video for any social media platform effortlessly in just a few clicks. If you want to share your videos on multiple social media platforms, you can easily resize your videos for specific social media channels like Instagram, YouTube, Facebook, and more. Promo.com provides social media presets that give the exact width and height for social platforms.
So Simple, Right?
Now that you know how to trim your footage and create amazing transition, put your knowledge to the test. Making videos is as easy as adding your logo and business info to an awesome template. Don’t believe us? Head to our templates library and see for yourself!

Explore more academy tutorials

How to Search for Footage
With over 100M photos and videos in our media library, you'll always find what you are looking for
How to Use Ready-made Templates
Use our ready-made templates to create a video that will stand out! Our template library features over 5,000 ready-made video templates for every occasion, product or service, updated regularly.
How to Select Your Video’s Aspect Ratio
Make sure that your video performs its best wherever it’s shared with three different aspect ratio publishing options: wide, square and vertical.
How to Publish a Video
Our publish page has all the video-sharing options you need. Here is how to access and use it.